
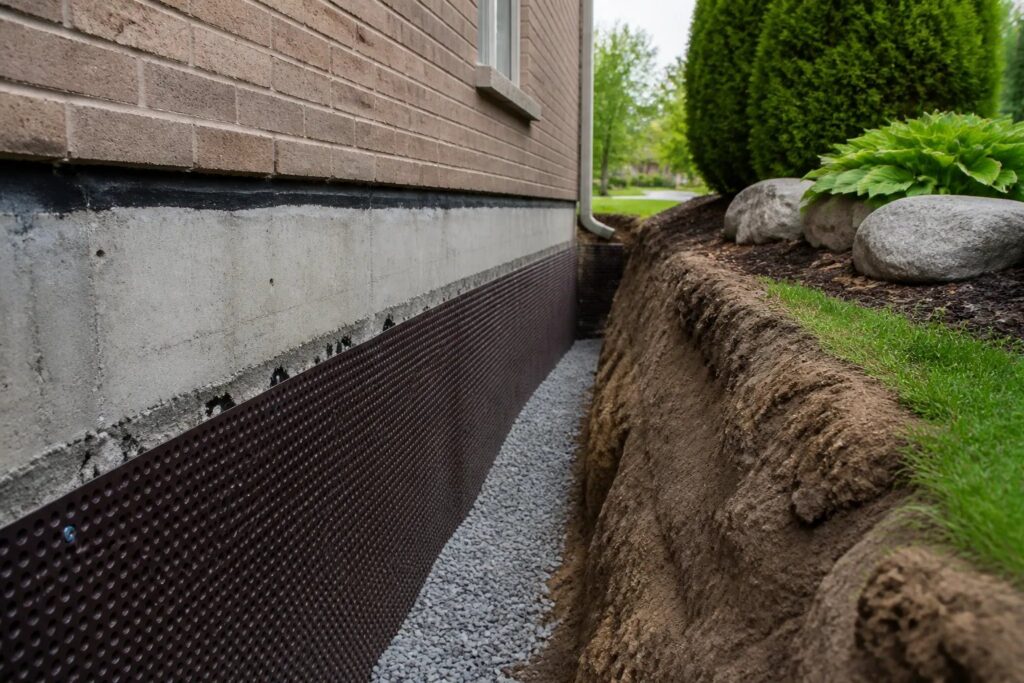
Exterior basement waterproofing for Milton homes involves exposing accessible below-grade foundation surfaces from outside so the wall, openings, protective waterproof layer, and footing drainage can be assessed and addressed. It is often a practical approach when the observed water route points to the exterior side of the foundation, but excavation is not automatically the answer to every damp wall or basement puddle.
The key is to connect the visible symptom to a likely route, then define exactly what will be treated and where water will go afterward. At Milton Basement Waterproofing, we provide exterior basement waterproofing as part of a property-specific approach to basement water problems in Milton.
What exterior waterproofing is designed to address
Exterior work gives access to the outside face of a below-grade foundation wall and the drainage conditions beside it. A typical scope can involve safely excavating the affected area, preparing and inspecting the wall, addressing accessible cracks or penetrations, applying a compatible waterproof layer and protection, addressing footing drainage, then backfilling and restoring the surface.
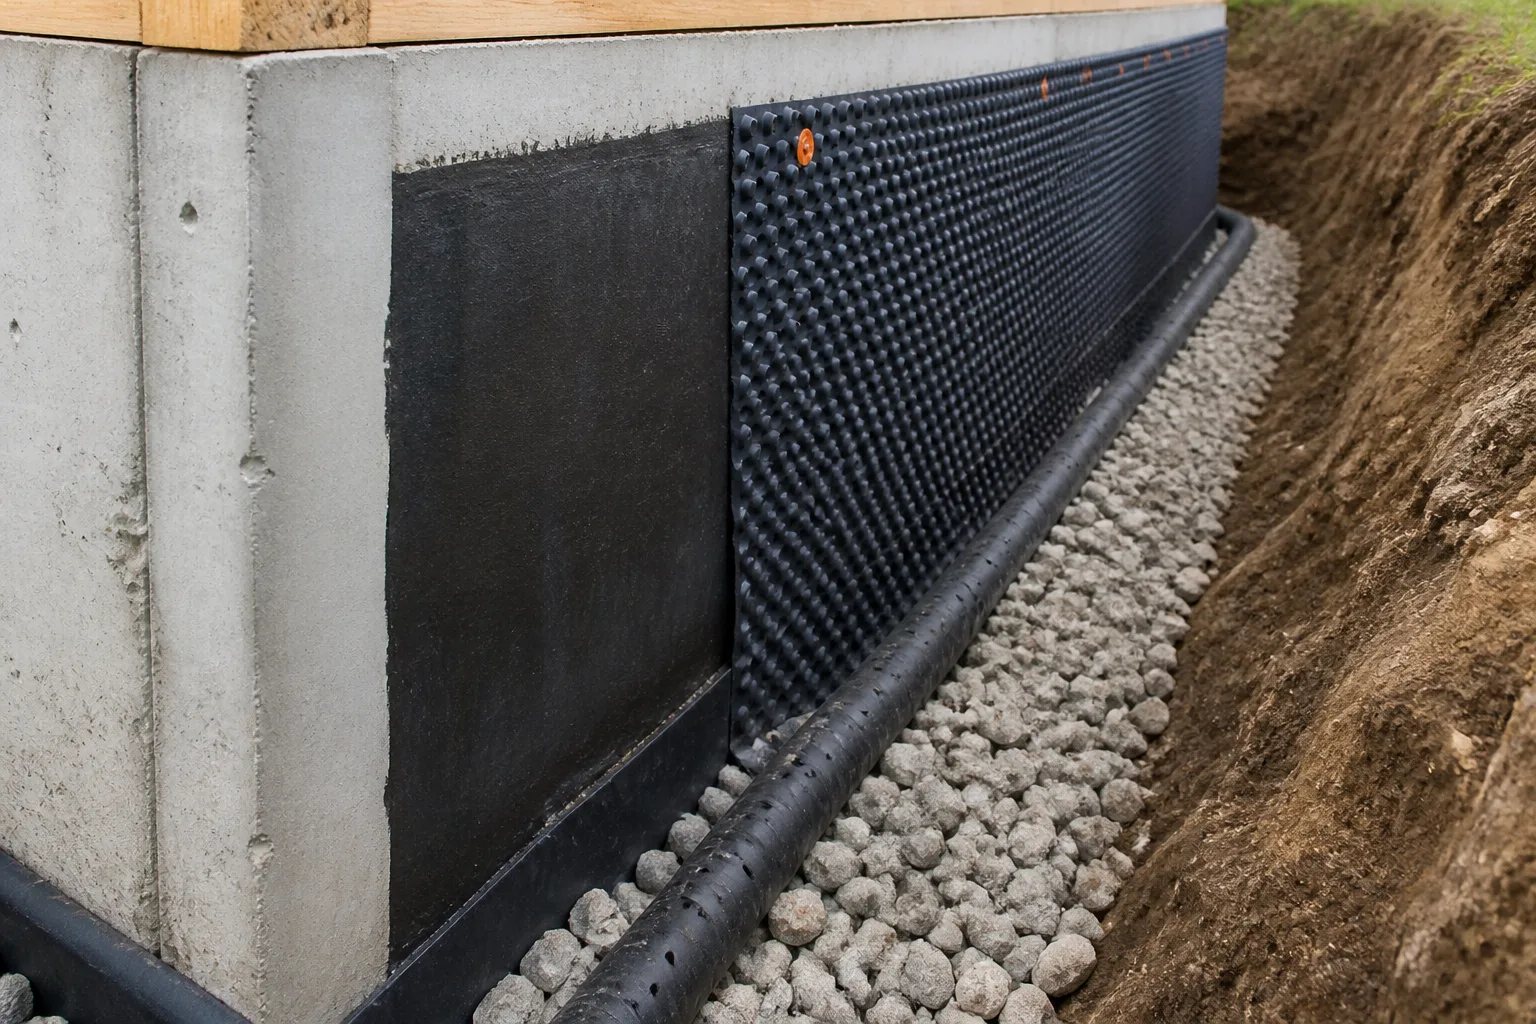
That sequence matters because a waterproof layer is only one part of water management. If water continues to collect beside the foundation or the drainage route has no suitable destination, a membrane alone cannot complete the solution. Roof runoff, downspout discharge, ground slope, window wells, existing footing-drain connections, and any sump discharge all affect the path water takes around a home.
Exterior work is most useful when the evidence supports addressing the foundation from outside. For example, a confirmed exterior wall opening, a recurring problem along an accessible foundation section, or drainage conditions that need closer review may warrant an exterior assessment. A wet area inside the basement, however, is a starting point for investigation, not proof that the full foundation needs excavation.
Start with the water pattern, not the largest stain
Water can travel behind finished walls, along a foundation surface, across the slab, or around a pipe before it becomes visible. The largest wet spot may therefore be some distance from the entry point. Before choosing a repair, record the first accessible damp location and what happened immediately before it appeared.
- Short, intense rain: Review surface runoff, downspout discharge, window wells, and openings that respond quickly to rainfall.
- Several days of rain: Review prolonged saturation around the foundation and drainage capacity.
- Late-winter thaw: Treat snowmelt as its own condition rather than assuming it behaves like a summer storm.
- Water during plumbing use: Investigate plumbing or wastewater pathways separately from rain-related seepage.
- Water or odour at a floor drain: Do not assume a foundation leak; drainage or sewer backup needs a different review.
In Milton, intense summer rain and late-winter thaw can create different water conditions at the same property. Take photos of accessible evidence before cleanup when it is safe, note the date and weather, and record whether the area dries between events. If water is entering near electrical equipment, avoid the affected area and arrange appropriate urgent assistance.
When exterior waterproofing may be the better route
Exterior waterproofing and interior drainage address different parts of a water problem. Exterior work exposes the outside wall and footing drainage. Interior perimeter drainage collects water at the wall-floor edge and routes it toward a suitable sump system. Neither method is automatically better.
Exterior work may deserve closer consideration when the affected exterior wall can be accessed and the suspected route involves the outside foundation face, an accessible wall opening, or footing drainage beside that wall. It can also preserve more finished basement space than an interior approach, though the tradeoff is disruption outdoors.
Access can be the deciding factor. A narrow side yard, deck, porch, patio, landscaping, utility line, air-conditioning equipment, paving, or neighbouring structure can limit excavation or affect restoration. Conversely, interior work can require selective removal of flooring, baseboards, lower drywall, insulation, or built-ins. Our interior versus exterior waterproofing guide explains the core difference in wall exposure, water collection, access, and restoration.
Key decision point
Exterior excavation is not a default repair
Exterior work can treat the outside wall and footing drainage, but a wet basement photo alone does not establish that excavation is needed. The proposed scope should identify the observed route it addresses and what other possible sources remain separate.
What affects the scope and disruption of exterior work
Two exterior waterproofing proposals can describe very different work. A localized repair might focus on a short wall section and a confirmed opening. A broader drainage scope might be considered when water appears along several walls or the existing footing-drain route needs attention. The evidence, not a generic label, should establish the boundary.
Before excavation begins, some conditions remain concealed. Old coatings, buried drain connections, foundation openings, and the condition of material behind landscaping or hardscape may only become visible once access is created. A clear scope should explain how newly discovered conditions will be handled rather than treating every unknown as already confirmed.
Outside, ask what will be protected, moved, removed, or restored. This can include planted beds, walkways, patios, decks, and mechanical equipment. Inside, consider whether finished walls conceal evidence that could affect the assessment. A repair plan should also identify whether permits or inspections may apply to changes involving sump connections, wastewater drainage, or finished basement work.
Follow water from collection to discharge
A dependable water-management plan follows the entire route: where water enters or gathers, how it is intercepted, and where it is discharged. A footing drain or sump system needs a suitable destination. Sending collected water back toward the foundation can undermine otherwise sound work.
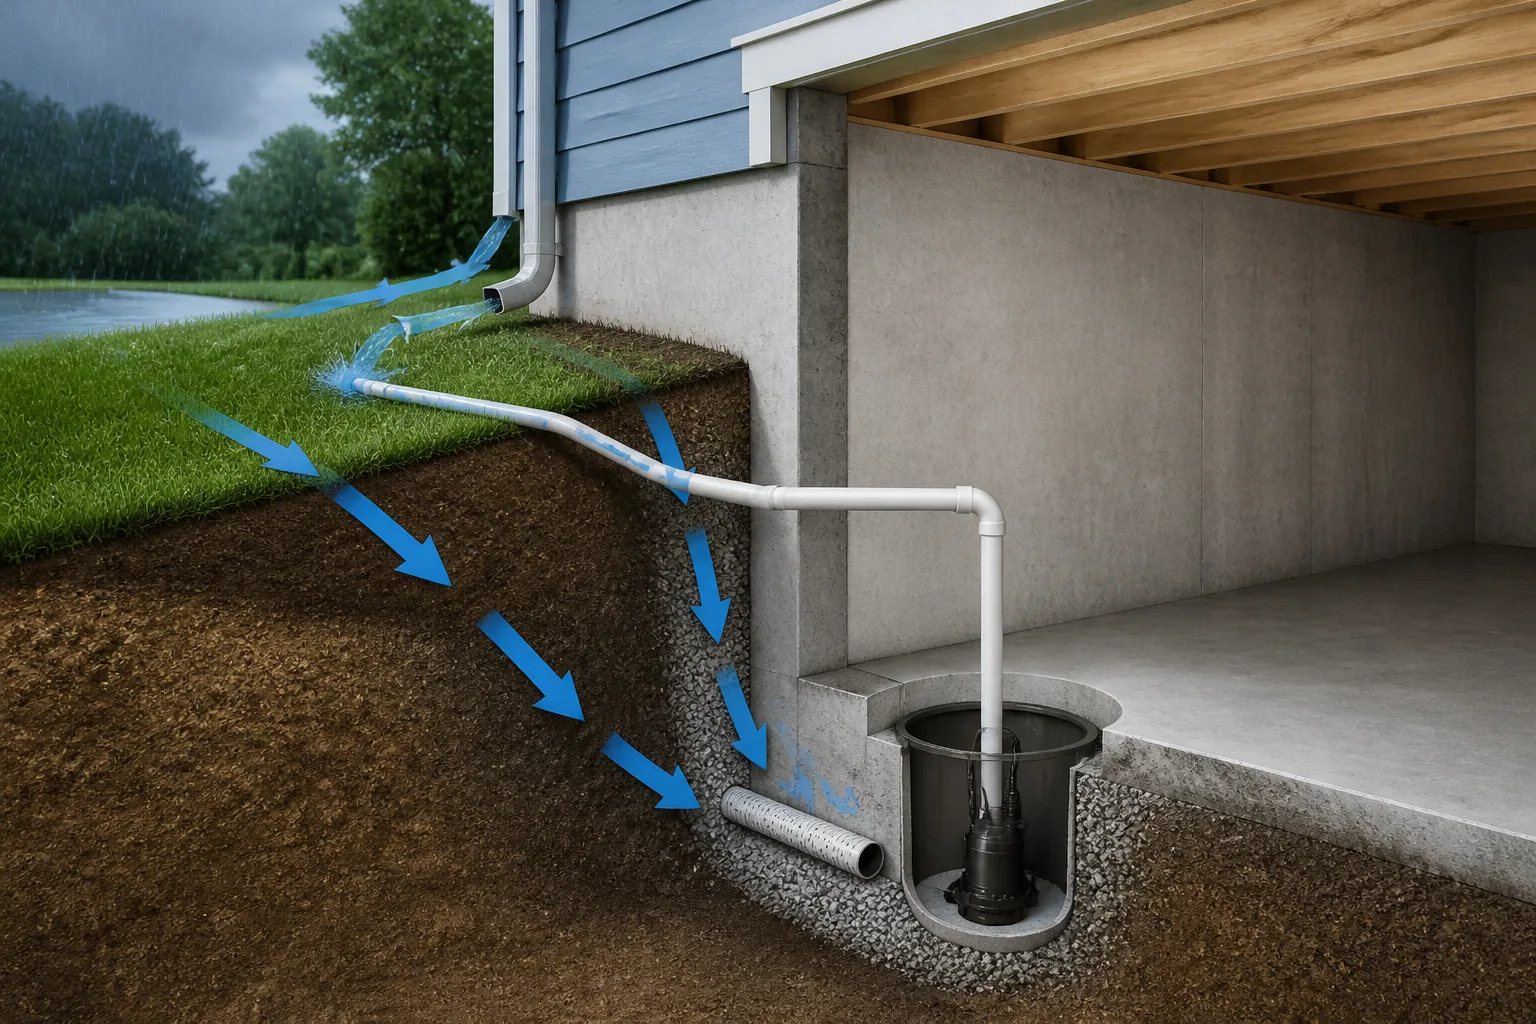
It also helps to keep related components distinct. A sump pump moves water delivered to its pit; it does not seal a basement window or foundation crack. A backwater valve addresses reverse wastewater flow; it does not collect groundwater at the foundation perimeter. Window-well drainage manages water around a below-grade window; it does not replace wall drainage where that is the actual problem.
We offer related drainage and pump services, including sump and flood-prevention work, but each component should have a defined purpose in the overall water path. If recurring wetness appears near a window, review the window interface, well drainage, and nearby runoff rather than assuming a pump or wall coating will solve it.
Questions that make an exterior waterproofing estimate easier to compare
A useful estimate does more than name a method. It should make clear what is known, what is still uncertain, and what physical work is included. Use the following questions to compare proposed scopes on their actual purpose and disruption.
Estimate checklist
Questions to ask before authorizing exterior waterproofing
Use these questions to make sure the proposed work matches the observed water path and clearly defines its limits.
- Which visible observation supports exterior work for this wall or section?
- What exact wall length, openings, drainage components, and connection points are included?
- Where will collected water discharge, and how does that outlet avoid returning water toward the foundation?
- What access is needed around decks, paving, landscaping, utilities, or mechanical equipment?
- What surfaces or landscape features will be protected, removed, and restored?
- How will concealed conditions, such as old coatings or buried drain connections, be handled if they differ from the initial review?
- Are demolition, spoil removal, restoration, permits, inspections, and documentation included or separate?
Documentation is valuable after the work as well. Keep the written scope, photos taken before and after access is created, and any permit or inspection records with your home documents. They provide a reference for future maintenance, renovation planning, or a later property owner.
What to monitor after drainage or exterior repairs
The next significant rain or thaw is a useful time to observe the same locations that were previously affected. Check whether accessible window wells drain, exterior outlets remain clear, and the sump cycles normally if the property uses one. This observation does not replace a completion review or any required inspection, but it can help distinguish a new symptom from the route that was addressed.
Surface maintenance remains worthwhile even after a repair. Keep downspouts directing water away from foundation walls, avoid grading that holds water beside the house, and clear accessible drains and window wells. These actions can reduce avoidable surface water pressure, but they do not diagnose or repair an established foundation leak on their own.
If you are seeing recurring dampness, visible water, or a changing pattern after rain or snowmelt, begin with the first wet location and its timing. That record gives an assessment a stronger starting point than a guessed repair based on one photograph.
Helpful answers
Frequently Asked Questions
Clarify the water path before choosing exterior work
Request an assessment to review visible symptoms, exterior access, drainage conditions, and the practical scope for your property.